If you’re looking to make a watertight seal on your bathroom sink, then knowing how to use plumber’s putty is essential. This versatile and durable material is perfect for sealing drains, faucets, and other plumbing fixtures. In this article, we’ll guide you through the step-by-step process of using plumber’s putty on your bathroom sink, ensuring a leak-free and long-lasting result. So, grab your tools, and let’s get started!
Preparing the Sink
Before you can start using plumber’s putty on your bathroom sink, you need to ensure that the sink is clean and free of any debris. Cleaning the sink thoroughly will help to create a better seal and ensure that the plumber’s putty adheres properly.
Cleaning the Sink
To clean the sink, start by removing any items that might be in and around the sink, such as soap dispensers or toothbrush holders. Next, use a non-abrasive cleaner and a sponge or cloth to scrub the surface of the sink thoroughly. Pay special attention to any areas that may have stains or build-up. Rinse the sink with warm water and dry it completely before moving on to the next step.
Removing Old Putty
If you are replacing an old sink or have previously used plumber’s putty on your sink, you will need to remove the old putty before applying a new layer. Use a putty knife or a similar tool to gently scrape off the old putty. Be careful not to scratch or damage the sink’s surface during this process. Once the old putty is removed, you can proceed with prepping the plumber’s putty.
Prepping the Plumber’s Putty
Preparing the plumber’s putty correctly is essential to ensure a proper and long-lasting seal. This involves choosing the right putty and softening it to make it easier to work with.
Choosing the Right Putty
When selecting plumber’s putty, it’s important to choose a high-quality product that is specifically designed for plumbing applications. Look for a putty that is moldable, long-lasting, and resistant to water and other common household chemicals. Reading product labels and reviews can help you find the best plumber’s putty for your needs.
Softening the Putty
Before you can apply the plumber’s putty to your sink, you need to soften it. To do this, take a small amount of putty and knead it in your hands until it becomes pliable and easy to work with. This step is crucial as softened putty will adhere better to the sink’s surface and allow for a more effective seal.
Applying the Plumber’s Putty
Now that your sink is clean and the putty is soft, you can start applying the plumber’s putty. Properly applying the putty requires preparing the work area and rolling the putty into a rope-like shape.
Preparing the Work Area
Before applying the putty, make sure the sink flange and surrounding edges are clean and dry. This will help the putty stick and create a better seal. Lay down a clean towel or piece of cardboard on the countertop or floor to protect the surface from any excess putty.
Rolling the Putty into a Rope
Once the work area is ready, take a small portion of the softened putty and roll it between your hands to create a rope-like shape. Aim for a thickness of about 1/2 inch and a length that is slightly longer than the circumference of the sink flange. The putty should be pliable but not excessively sticky. Adjust the size of the putty rope as needed.
Sealing the Sink
With the putty prepared, you can now proceed to seal the sink using the plumber’s putty. This involves placing the putty on the sink flange and mounting the sink in place.
Placing the Putty on Sink Flange
Take the rope of putty you created and carefully place it around the underside of the sink flange. Gently press the putty onto the flange, ensuring that it is evenly distributed and covers the entire circumference of the flange. Use your fingers to smooth out any bumps or uneven areas in the putty.
Mounting the Sink
Once the putty is in place, carefully lower your sink onto the mounting surface. Make sure it is aligned properly and apply even pressure to secure it in place. Wipe away any excess putty that may have squeezed out from beneath the sink.
Finishing the Installation
After the sink is mounted and secure, there are a few final steps to complete the installation. This includes removing any excess putty and cleaning up the work area.
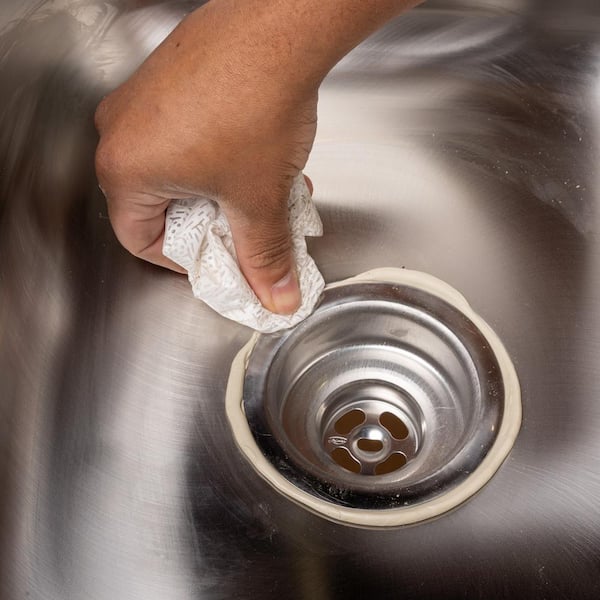
Removing Excess Putty
Using a putty knife or a similar tool, gently scrape off any excess putty that may have squeezed out during the mounting process. Take care not to scratch or damage the sink’s surface while doing this. Wipe away any remaining residue with a clean cloth or sponge.
Cleaning Up
Once the excess putty is removed, clean the sink and surrounding area with a mild household cleaner and warm water. Dry everything thoroughly to prevent any water spots or residue from forming.
Common Mistakes to Avoid
While using plumber’s putty, there are a few common mistakes that you should be aware of to ensure a successful application.
Using Too Much Putty
One of the most common mistakes is using too much putty. Excessive putty not only wastes the product but can also interfere with the proper installation of the sink. Only use enough putty to create a thin, even layer around the sink flange.
Applying Uneven Pressure
When mounting the sink, it’s important to apply even pressure to ensure a secure fit. Uneven distribution of pressure can lead to an uneven seal and potential leaks. Take your time and apply pressure evenly to all sides of the sink while lowering it into place.
Benefits of Using Plumber’s Putty
There are several benefits to using plumber’s putty for sink installations, making it a popular choice among homeowners and professionals alike.
Waterproof Seal
Plumber’s putty creates a waterproof seal, preventing water and other liquids from seeping beneath the sink and causing damage. This can help to prolong the life of your sink and prevent costly repairs.
Easy Removal
If you ever need to remove the sink in the future, plumber’s putty makes the task much easier. It remains pliable, allowing you to easily scrape off the putty and detach the sink without damaging the surrounding surfaces.
Different Types of Sink Applications
Plumber’s putty can be used for various types of sink applications, including undermount sinks and top mount sinks.
Undermount Sinks
When installing an undermount sink, plumber’s putty is typically applied to create a seal between the sink and the countertop. The putty helps to secure the sink and prevent water from seeping into the cabinet below.
Top Mount Sinks
For top mount sinks, plumber’s putty is used to seal the sink flange against the countertop. This creates a watertight seal and helps to hold the sink in place.
Alternative Options to Plumber’s Putty
While plumber’s putty is a popular choice for sink installations, there are alternative options available that may better suit your needs or preferences.
Silicone Caulk
Silicone caulk is a common alternative to plumber’s putty. It can create a strong, waterproof seal and is suitable for use with various sink materials. However, caulk requires more drying time, and excess caulk can be harder to remove.
Teflon Tape
Teflon tape, also known as plumber’s tape, is another alternative to plumber’s putty. It is typically used to create a watertight seal on threaded pipe connections. While it is not used for sink installations, it can be a useful tool in other plumbing applications.
Frequently Asked Questions
How long does plumber’s putty take to dry?
Plumber’s putty does not dry like other adhesives or sealants. It remains pliable and soft, allowing for easy removal if needed. However, it may take several hours for the putty to fully settle and create a secure seal.
Can plumber’s putty be used on all sink materials?
Plumber’s putty is generally safe to use on most sink materials, such as stainless steel, porcelain, and composite sinks. However, it should not be used on certain materials, including granite or quartz, as it can cause staining or damage. For such materials, it’s best to consult the manufacturer’s recommendations or use an alternative sealing method like silicone caulk.