Are you planning to tackle a plumbing project yourself? Before you get started, you need to know how long plumber’s putty takes to dry. This crucial information can save you from potential leaks and ensure the success of your DIY plumbing endeavors. In this article, we will explore the drying time of plumber’s putty and provide you with tips and advice to ensure that your plumbing repairs or installations are done correctly. So, let’s jump right in and discover how long plumber’s putty takes to dry and how to make the most of this versatile plumbing tool.
How Long Plumber Putty Takes to Dry
Plumber putty is a versatile sealant used in plumbing applications to create watertight seals around joints and fixtures. One of the most common questions among DIY enthusiasts and homeowners is how long plumber putty takes to dry. The drying time of plumber putty can vary depending on several factors, including the composition of the putty, the surface material, the environmental conditions, and the thickness of the putty layer. In this article, we will explore these factors in detail and provide some tips for handling freshly applied plumber putty.
Factors Affecting the Drying Time of Plumber Putty
Several factors can influence the drying time of plumber putty. Understanding these factors can help you estimate how long it will take for the putty to dry fully. The key factors include:
Composition of the Putty
Plumber putty is typically composed of a mixture of resins, fillers, and oils. The specific composition can vary depending on the brand and type of putty. Different ingredients can impact the drying time of the putty. Some putties contain solvents that evaporate quickly, resulting in faster drying times, while others may take longer to cure.
Properties of the Surface Material
The type of surface material on which the plumber putty is applied also plays a role in the drying time. Porous materials, such as wood or rough stones, tend to absorb moisture from the putty, increasing the drying time. On the other hand, non-porous surfaces like metal or glazed ceramics may not absorb moisture, allowing the putty to dry faster.
Environmental Conditions
Relative humidity and temperature are crucial environmental factors that affect the drying time of plumber putty. Higher humidity levels can slow down the evaporation process, prolonging the drying time. Similarly, lower temperatures can impede the curing process. Ideally, a moderate humidity range of 40% to 60% and a temperature between 70°F and 80°F are recommended for efficient drying.
Thickness of the Putty Layer
The thickness of the plumber putty layer is directly proportional to the drying time. Thicker layers will take longer to dry compared to thinner layers. It is important to apply the putty evenly and not exceed the recommended thickness to ensure proper drying within a reasonable time frame.
The Composition of Plumber Putty
To understand the drying time of plumber putty better, let’s take a closer look at its composition. Plumber putty typically consists of a mixture of resins, fillers, and oils.
Main Ingredients
The main ingredients in plumber putty are usually calcium carbonate, linseed oil, and a combination of various resins. Calcium carbonate acts as a filler, providing the putty with stability and strength. Linseed oil serves as a binder that holds all the ingredients together and contributes to the flexibility and durability of the putty.
Role of Resins and Fillers
Resins play a crucial role in the drying and hardening process of plumber putty. They undergo a chemical reaction and cross-link with the oxygen in the air, resulting in a solid and waterproof seal. The resins also provide adhesion, ensuring that the putty sticks to the surface effectively.
Fillers, like calcium carbonate, increase the volume of the putty and enhance its stability. They also improve the texture and workability of the putty, making it easier to mold and shape.
Chemical Reaction and Curing Process
When exposed to air, the linseed oil in the putty begins to oxidize, initiating a chemical reaction known as curing. This reaction causes the putty to harden over time, forming a secure and flexible seal. The curing process can take anywhere from a few hours to several days, depending on the specific brand and type of putty.
Surface Material and Porosity
The surface material on which the plumber putty is applied can significantly impact the drying time. Different materials have varying levels of porosity and absorbency, affecting how quickly the putty dries.
Porosity and Absorbency of Different Materials
Porous materials, such as wood, stone, or unglazed ceramics, have small pores or interconnected spaces that can absorb moisture. When plumber putty is applied to porous surfaces, the moisture in the putty is absorbed by the material, making it take longer to dry. Non-porous surfaces, like metal, glazed ceramics, or plastic, do not have absorbent qualities, allowing the putty to dry faster.
Impact of Porosity on Drying Time
It is important to consider the porosity of the surface material when estimating the drying time of plumber putty. If you are working with a porous material, you can expect a longer drying time compared to a non-porous material. Applying a thinner layer of putty or using a non-oil-based putty can help accelerate the drying process on porous surfaces.
Relative Humidity and Temperature
Relative humidity and temperature are vital environmental factors that can affect how quickly plumber putty dries. The moisture in the putty evaporates as the drying process occurs, and the rate at which it evaporates depends on the surrounding humidity and temperature.
Effects of Humidity and Temperature
Higher humidity levels in the air can slow down the evaporation process, lengthening the drying time of the putty. Similarly, lower temperatures can impede the curing process, making it take longer for the putty to dry fully. It is essential to take these factors into account and choose the optimal conditions for efficient drying.
Recommended Range for Efficient Drying
For most plumber putties, a moderate humidity range of 40% to 60% and a temperature between 70°F and 80°F are considered ideal for efficient drying. These conditions promote the proper evaporation of moisture from the putty without excessively prolonging or hindering the drying process.
Thickness of the Putty Layer
The thickness of the plumber putty layer is another crucial factor that affects the drying time. As a general rule, thicker layers of putty will take longer to dry compared to thinner layers.
Relation Between Thickness and Drying Time
Thicker layers of putty require more time for the moisture to evaporate fully. The outer layer may appear dry, but the interior layers will take longer to cure. It is important not to exceed the recommended thickness when applying plumber putty to ensure effective drying within a reasonable time frame.
Adjusting Application Technique to Reduce Drying Time
If you are looking to reduce the drying time of plumber putty, you can adjust your application technique accordingly. Applying a thinner layer of putty can help speed up the drying process. Additionally, evenly spreading the putty and avoiding excess buildup can promote efficient evaporation, allowing the putty to dry faster.
Different Types of Plumber Putty
There are different types of plumber putty available on the market, and each type can have different drying times. The two main types of plumber putty are oil-based and non-oil-based putty.
Oil-Based Plumber Putty
Oil-based putty has been used for many years as a reliable choice for plumbing applications. It usually contains linseed oil as a key ingredient that contributes to its pliable and flexible nature. Oil-based putty tends to have a longer drying time due to the slow evaporation of oils. On average, it can take around 24 to 48 hours for oil-based putty to fully dry.
Non-Oil-Based Plumber Putty
Non-oil-based plumber putty is a relatively newer formulation that is gaining popularity. It does not contain linseed oil or any other oils that can prolong the drying time. Non-oil-based putty is typically made up of synthetic or hybrid materials that accelerate the drying process. Depending on the specific brand and composition, non-oil-based putty can dry within a few hours.
Differences in Drying Time
The drying time of plumber putty can vary significantly between oil-based and non-oil-based types. While oil-based putty may take up to 48 hours to dry, non-oil-based putty can dry within a few hours. It is important to read the manufacturer’s instructions and understand the specific drying time for the type of putty you are using.
Standard Drying Time
The drying time of plumber putty can be subjective and depend on various factors. However, there are recommended waiting times that can serve as a general guideline.
Recommended Waiting Time
As a rule of thumb, it is advisable to wait at least 24 hours before subjecting the plumber putty to any water exposure or pressure. This waiting period allows ample time for the putty to dry and cure, ensuring a strong seal. However, it is worth noting that the drying time can still vary based on the specific brand, composition, and environmental conditions.
Common Variations
It is important to note that the recommended waiting time can vary depending on the type of putty and the specific project requirements. Certain applications or specific brands may have different instructions for drying time. Always refer to the manufacturer’s guidelines and follow their recommendations for the best results.
Accelerating the Drying Process
If you are looking to expedite the drying time of plumber putty, there are a few techniques you can employ. However, it is vital to exercise caution and ensure proper drying to achieve a durable and watertight seal.
Using Heat Sources
Applying gentle heat to the plumber putty can help speed up the drying process. You can use a hairdryer on a low heat setting or a heat gun kept at a safe distance from the putty surface. Be cautious not to overheat the putty, as it can result in cracking or premature failure of the seal. It is crucial to follow the manufacturer’s instructions and use heat sources appropriately.
Using Dehumidifiers
Dehumidifiers can be effective in reducing the humidity level in the air, promoting faster drying of plumber putty. If the ambient humidity is high, running a dehumidifier in the room can help create a more favorable environment for the putty to dry efficiently. It is essential to monitor the humidity levels and ensure they are within the recommended range to avoid any adverse effects.
Precautions to Ensure Proper Drying
While it may be tempting to accelerate the drying process, it is paramount to exercise caution and ensure the putty dries properly. Rushing the drying time can compromise the integrity of the seal and lead to leaks or other issues. Always follow the manufacturer’s instructions, employ the recommended techniques cautiously, and allow sufficient time for the putty to dry and cure.
Tips for Handling Freshly Applied Plumber Putty
After applying plumber putty, it is important to handle it with care to ensure a successful and long-lasting seal. Here are some tips to help you handle freshly applied plumber putty effectively:
Removing Excess Putty
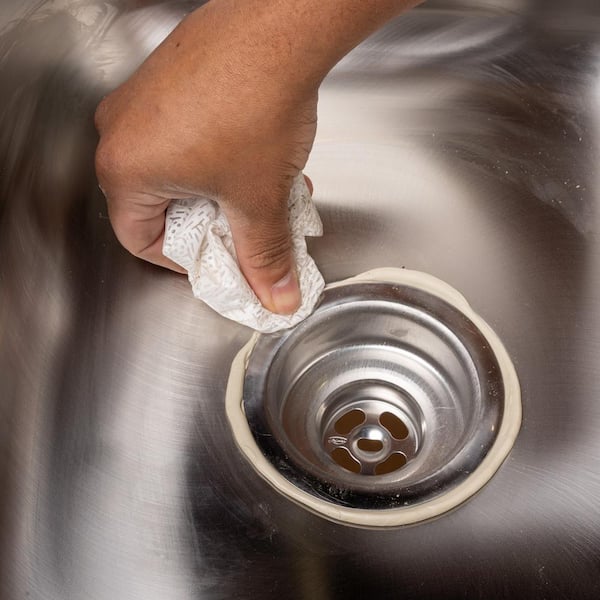
After applying the putty, remove any excess or overflow using a putty knife or a damp cloth. Excess putty can interfere with the drying process and compromise the quality of the seal. Ensure that the putty is evenly spread across the joint or fixture, leaving a smooth and uniform surface.
Cleaning Tools and Surfaces
Clean any tools, such as putty knives or spatulas, immediately after use to prevent the putty from hardening on them. Wipe off any excess putty from the surface using a damp cloth or sponge, being careful not to disturb the applied putty. Clean surfaces will not only facilitate proper drying but also ensure a neat and professional finish.
Allowing Sufficient Curing Time
To achieve a strong and durable seal, it is crucial to allow sufficient time for the putty to cure. Follow the recommended waiting time provided by the manufacturer before subjecting the putty to any water exposure or pressure. Rushing the curing process can compromise the integrity of the seal and result in leaks or failures.
Avoiding Water Exposure
Avoid any water exposure or moisture contact with the freshly applied putty during the drying and curing process. Water can interfere with the putty’s ability to dry properly and can lead to a weak seal. Exercise caution when using water fixtures or plumbing connections adjacent to the applied putty, and wait until the putty is fully cured before using them.
In conclusion, the drying time of plumber putty can vary depending on several factors, including the composition of the putty, the surface material, the environmental conditions, and the thickness of the putty layer. Understanding these factors and following the manufacturer’s instructions can help you estimate and achieve an efficient drying time. Always prioritize safety considerations and handle freshly applied plumber putty with care to ensure a successful and long-lasting seal.


