Imagine you’re in the middle of a bathroom renovation project and you need to fix a leaky pipe. You reach for your trusty plumber’s putty to seal the joints, but you suddenly realize you have no idea how long it takes for the putty to set. Don’t panic! In this article, we’ll explore the fascinating world of plumber’s putty and uncover the answer to the burning question: how long does it take for this magical substance to fully set? So sit back, relax, and get ready to become a putty expert in no time!
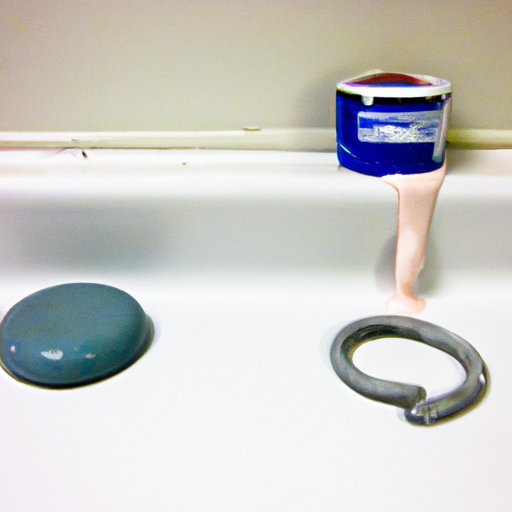
What is Plumber’s Putty?
Plumber’s putty is a versatile and essential material used in plumbing projects. It is a type of sealing putty that is applied to create a watertight seal between plumbing fixtures and surfaces. Plumber’s putty is a pliable and moldable substance that helps prevent leaks and ensure the proper functioning of various plumbing installations.
What is plumber’s putty made of?
Plumber’s putty is typically composed of a combination of natural ingredients, including linseed oil, powdered limestone or clay, and other additives. The linseed oil provides the putty with its pliability and helps it adhere to surfaces, while the powdered limestone or clay gives it its durability and strength.
What is plumber’s putty used for?
Plumber’s putty is primarily used for its sealing properties in various plumbing applications. It is commonly used to create water-tight seals around sink drains, faucets, and other plumbing fixtures, ensuring that no water or other liquids leak out. It is also useful for sealing threaded joints, such as those found in pipes, and acts as a cushioning material to prevent vibrations.
What are the different types of plumber’s putty?
There are two main types of plumber’s putty: oil-based and water-based. These types have slight differences in their composition and setting time, making them suitable for different applications.
Factors Affecting Setting Time
The setting time of plumber’s putty refers to the time it takes for the putty to harden or cure fully. Several factors can influence the setting time of plumber’s putty, including its composition, ambient temperature, humidity, and the thickness of the applied putty layer.
Composition of the plumber’s putty
The composition of the plumber’s putty plays a significant role in its setting time. Different manufacturers may utilize various additives or ratios of ingredients, which can affect the curing process. It is essential to follow the specific instructions provided by the manufacturer to achieve the optimal setting time.
Ambient temperature and humidity
The ambient temperature and humidity in the area where the plumber’s putty is applied can impact its setting time. Warmer temperatures generally accelerate the curing process, while colder temperatures may extend the setting time. Similarly, high levels of humidity can prolong the drying and setting process, while low humidity can speed it up.
Thickness of the applied putty layer
The thickness of the putty layer applied also affects the setting time. Thicker layers of putty generally take longer to set, as the curing process needs more time to penetrate through the entire thickness. Conversely, thin layers may set relatively faster.
Average Setting Time
The setting time of plumber’s putty can vary depending on several factors. However, there are typical setting times that can serve as a guideline for users.
Typical setting time for plumber’s putty
On average, plumber’s putty typically takes anywhere between 1 to 24 hours to fully set and cure. This range gives the putty sufficient time to harden and create a reliable seal. However, it is important to note that specific products may have different recommended setting times, so always refer to the manufacturer’s instructions for accurate information.
Influence of different factors on setting time
The setting time of plumber’s putty can be influenced by the factors mentioned earlier. The composition of the putty, ambient temperature, humidity, and thickness of the applied layer all play a role in determining how long it takes for the putty to set properly. Therefore, it is crucial to consider these factors when estimating the setting time and planning your plumbing project accordingly.
Types of Plumbers Putty and Their Setting Time
Plumber’s putty is available in two main types: oil-based and water-based. Each type has its own unique characteristics, including differences in setting time.
Oil-Based Plumber’s Putty
Oil-based plumber’s putty is the more traditional and widely used type. It is composed of linseed oil, powdered limestone, and other additives. Oil-based putty tends to have a longer setting time compared to water-based putty.
Setting time of oil-based plumber’s putty
Oil-based plumber’s putty typically takes around 12 to 24 hours to fully set and cure. This longer setting time allows for proper adhesion and sealing capabilities. However, it is essential to verify the specific setting time recommended by the manufacturer of the putty you are using, as it may vary.
Water-Based Plumber’s Putty
Water-based plumber’s putty is a newer alternative to the traditional oil-based putty. It is composed of synthetic polymers, clays, and other components. Water-based putty is generally non-staining, easier to work with, and has a quicker setting time than oil-based putty.
Setting time of water-based plumber’s putty
Water-based plumber’s putty typically sets and cures in a shorter time frame compared to oil-based putty. It generally takes around 1 to 2 hours for water-based putty to fully set. This quicker setting time can be advantageous when working on projects that require faster completion.
Application Process
Proper application of plumber’s putty is crucial to ensure a reliable and long-lasting seal. Here is a step-by-step guide to help you apply plumber’s putty correctly:
Preparation before applying plumber’s putty
-
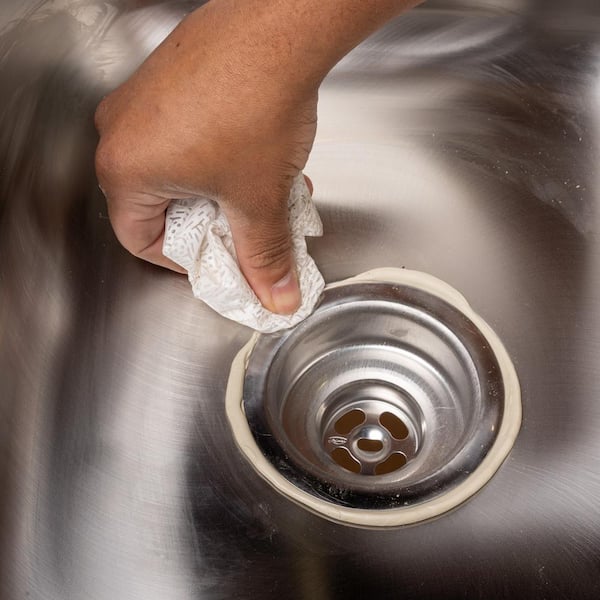
Clean the surfaces: Before applying the putty, make sure the surfaces are clean, dry, and free from any dirt, grime, or old putty residues. Use a mild detergent or a suitable cleaning agent to thoroughly clean the area.
-
Cut the putty: Take a suitable amount of plumber’s putty and cut or break off a piece from the main portion. The size will depend on the specific requirements of your project.
Step-by-step guide to applying plumber’s putty
-
Soften the putty: Knead and roll the putty in your hands until it becomes soft and pliable. This process ensures that the putty will be easier to work with and achieve a good seal.
-
Shape the putty: Roll the putty into a rope-like shape or form it into a flat, disc-like shape, depending on the application. Ensure that the putty is of sufficient length and width to cover the area where it will be applied.
-
Apply the putty: Gently press and mold the putty onto the desired surface, such as around a sink drain or faucet base. Apply even pressure to ensure the putty adheres properly. Remove any excess putty that may squeeze out from the edges.
-
Tighten the fixture: Once the putty is applied, proceed to tighten or install the plumbing fixture, ensuring it is properly aligned and securely fastened.
-
Wipe off excess putty: Use a clean cloth or sponge to wipe off any excess putty that may have squeezed out during the application process. This step helps achieve a neat and tidy finish.
-
Allow sufficient setting time: The putty needs adequate time to set and harden fully. Follow the manufacturer’s instructions regarding the recommended setting time before using any water or applying any pressure on the sealed plumbing fixture.
Drying vs. Setting Time
Understanding the difference between drying and setting time is important when working with plumber’s putty.
Difference between drying and setting time
Drying time refers to the period it takes for the putty to lose its moisture content and become dry to the touch. This stage occurs before the putty reaches its fully cured and hardened state. On the other hand, setting time refers to the duration it takes for the putty to completely cure and harden, forming a solid and reliable seal.
Importance of allowing sufficient setting time
Allowing sufficient setting time is crucial to ensure the effectiveness and longevity of the plumber’s putty seal. Rushing the process by using the plumbing fixture or applying pressure too soon can compromise the seal and may lead to leaks or other issues over time. It is important to follow the manufacturer’s instructions and allow the recommended setting time for optimal results.
Tips for Allowing Proper Setting Time
To ensure that the plumber’s putty sets properly and provides a durable and effective seal, consider the following tips:
Checking the manufacturer’s instructions
Always read and follow the manufacturer’s instructions provided on the packaging of the plumber’s putty. Different products may have varying composition and recommended setting times. Adhering to the specific instructions will help you achieve the best results.
Considering environmental conditions
Take into account the ambient temperature and humidity levels when estimating the setting time. Adjustments may be necessary depending on these conditions. Higher temperatures generally speed up the setting process, while lower temperatures can slow it down. Similarly, high humidity can prolong curing, while low humidity may expedite it.
Testing the set-up of the putty
Before applying any water or pressure to the plumbing fixture, test the set-up of the putty by gently touching it. If the putty feels firm and doesn’t leave any residue on your finger, it is likely fully cured and ready for use. However, if it feels tacky or soft, allow more time for it to set before proceeding.
Alternative Methods for Faster Setting
In certain situations where time is of the essence, there are alternative methods that can help expedite the setting process of plumber’s putty.
Using fast-setting plumber’s putty
Fast-setting plumber’s putty is a specialized type of putty specifically formulated to cure and harden at a much quicker pace compared to standard putty. If time is a limiting factor, using fast-setting plumber’s putty can significantly reduce the setting time, allowing for quicker completion of your plumbing project.
Applying heat to expedite the setting process
Applying gentle heat to the area where the plumber’s putty is applied can help accelerate the setting time. However, it is crucial to exercise caution and avoid excessive heat, as it may lead to damage or cracking of the putty or surrounding materials. Use a suitable heat source, such as a hairdryer on a low setting, and maintain a safe distance to avoid any issues.
Factors That Can Delay Setting Time
While there are methods to speed up the setting time of plumber’s putty, certain factors can inadvertently delay the process. Being aware of these factors can help you plan and execute your plumbing projects more effectively.
Cold temperatures
Cold temperatures can significantly slow down the setting time of plumber’s putty. If working in a colder environment, consider adjusting your timeline accordingly and allowing extra time for the putty to properly cure. Providing a warmer environment or utilizing other methods, such as applying gentle heat, can help mitigate the effects of cold temperatures.
Excessive moisture exposure
Excessive moisture exposure, such as high levels of humidity or contact with water, can delay the setting time of plumber’s putty. Ensure that the area where the putty is applied remains dry during the curing process. If working in a humid environment, take the necessary precautions to minimize humidity levels or use a dehumidifier to create a drier space.
Thicker layers of putty
Applying thicker layers of putty can prolong the setting time, as the curing process needs more time to reach the inner layers. It is important to strike a balance between achieving a sufficient seal and ensuring a reasonable setting time. For faster results, consider using thinner layers or exploring alternative method options, such as fast-setting putty.
Conclusion
Plumber’s putty is an invaluable material for any plumbing project, providing a reliable and watertight seal around various plumbing fixtures. Understanding the factors that affect its setting time, the different types available, and proper application techniques can help ensure a successful outcome. By allowing the putty sufficient setting time before using any water or exerting pressure on the seal, you can ensure a long-lasting and leak-free plumbing installation. Remember to follow the manufacturer’s instructions and consider environmental conditions to achieve the best results. Whether you are a seasoned DIY enthusiast or a professional plumber, plumber’s putty is an indispensable tool in your plumbing arsenal.