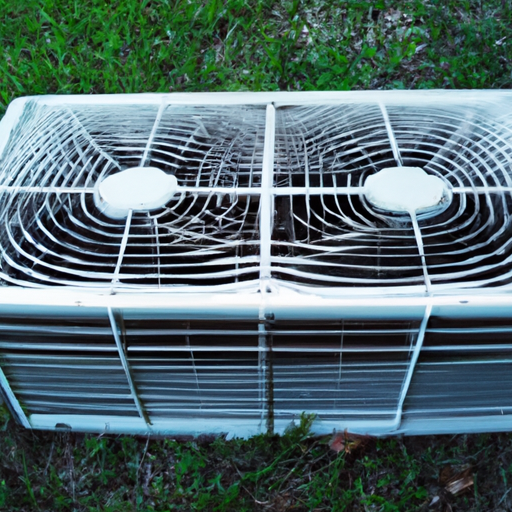
So you’ve noticed that your window AC unit is not running efficiently and you’re wondering how to clean it? Look no further! In this article, we will guide you through the step-by-step process of cleaning your window AC unit, ensuring that it runs smoothly and effectively throughout the hot summer months. Don’t worry, it’s easier than you think! With our helpful tips and tricks, you’ll have your AC unit working like new in no time. Say goodbye to hot and stuffy rooms, and say hello to cool and refreshing air. Let’s get started!
1. Gather Cleaning Supplies
Before you begin cleaning your window AC unit, it’s important to gather all the necessary cleaning supplies. Here’s a list of items you will need:
1.1. Vacuum Cleaner
A vacuum cleaner will help you remove any loose debris or dust from the unit. Make sure you have a brush attachment for better efficiency.
1.2. Soft Brush
A soft brush will be useful for cleaning the delicate parts of the AC unit, such as the fins and coils. Look for a brush with gentle bristles to avoid damaging these components.
1.3. Microfiber Cloth
Microfiber cloth is excellent for wiping down the exterior surfaces of the AC unit. It is designed to trap dust particles effectively and leaves no streaks or lint behind.
1.4. Fin Comb
A fin comb is a handy tool for straightening bent fins. Over time, the fins on your AC unit may become bent, restricting airflow. Using a fin comb can help restore optimal performance.
1.5. Mild Detergent
You will need a mild detergent to clean the filter, drain pan, and other parts of the AC unit. Avoid using harsh chemicals as they may damage the components.
1.6. Spray Bottle
Fill a spray bottle with a mixture of water and mild detergent to use for cleaning purposes. This will help you easily apply the cleaning solution to different parts of the AC unit.
1.7. Bucket
A bucket will come in handy for collecting any dirty water or debris that you may encounter during the cleaning process. It is essential to have a container ready for easy disposal.
1.8. Screwdriver
Keep a screwdriver nearby to help with any disassembly or reassembly of the AC unit. Different models may require the use of a screwdriver to access specific components.
1.9. Gloves
Wearing gloves will protect your hands from dirt, cleaning chemicals, and any sharp edges you may encounter while cleaning. Opt for gloves that provide both comfort and flexibility.
2. Turn Off the AC Unit and Unplug
2.1. Safety First!
Before you proceed with cleaning your window AC unit, safety should always be your top priority. Start by ensuring that the unit is turned off and unplugged to prevent any accidents.
2.2. Switch Off the AC
Locate the power switch or control panel of your AC unit and turn it off. This step will ensure that there is no electrical current running through the unit while you clean it.
2.3. Unplug from Power Source
To ensure complete safety, unplug the AC unit from its power source. This step will prevent any accidental turning on of the unit while you are cleaning it, reducing the risk of electric shock.
3. Remove the Filter
3.1. Locate the Filter
The filter is an essential component of your window AC unit, as it helps remove airborne particles and ensures clean air circulation. Locate the filter, usually located behind the front grille or cover of the unit.
3.2. Remove the Filter
Gently remove the filter from its designated slot. Some models have filters that slide out, while others may require unscrewing or unlocking a latch. Refer to your specific AC unit’s manual for detailed instructions.
3.3. Clean the Filter
Once the filter is removed, you can clean it using a combination of mild detergent and water. Gently wash the filter, taking care not to damage it. Rinse thoroughly and allow it to dry completely before reinstalling.
4. Clean the Exterior
4.1. Dusting the Surface
Using a soft brush or a vacuum cleaner with a brush attachment, gently remove any loose dust or debris from the exterior surfaces of the AC unit. Pay attention to areas around the grille, fins, and vents.
4.2. Wiping with a Damp Cloth
Dampen a microfiber cloth with a mixture of water and mild detergent. Wipe down the exterior surfaces of the AC unit, including the grille, front cover, and sides. Remove any stubborn dirt or grime.
4.3. Cleaning Grilles and Vents
Take extra care when cleaning the grilles and vents. Use a soft brush or a fin comb to remove any dirt or debris that may have accumulated. Ensure that the airways are clear for proper airflow.
5. Clean the Condenser Coils
5.1. Accessing the Coils
To clean the condenser coils, you may need to remove the outer cover or grille of the AC unit. Refer to the manufacturer’s instructions for your specific model to safely access the coils.
5.2. Vacuuming Loose Debris
Use a vacuum cleaner with a brush attachment to remove loose debris, such as leaves, twigs, or dust, from the condenser coils. Vacuum according to the coil’s direction to avoid damaging the delicate fins.
5.3. Brushing the Coils
Using a soft brush, gently brush the condenser coils to remove any stubborn dirt or debris that the vacuum cleaner may have missed. Pay close attention to the spaces between the fins to ensure thorough cleaning.
5.4. Spray Cleaning Solution
Prepare a cleaning solution by diluting mild detergent in water and filling a spray bottle. Spray the cleaning solution onto the condenser coils, covering them evenly. Allow the solution to sit for a few minutes to loosen stubborn dirt.
5.5. Rinsing the Coils
After the cleaning solution has had time to work, rinse the condenser coils thoroughly with clean water. Use a gentle water stream from a hose or a bucket filled with water to remove all traces of the cleaning solution.
5.6. Drying the Coils
Allow the condenser coils to air dry completely before reassembling the AC unit. Ensure that no moisture is trapped in the coils, as this can lead to mold or mildew growth. Patience is key here, as proper drying is crucial.
6. Clean the Evaporator Coil
6.1. Accessing the Evaporator Coil
To access the evaporator coil, you may need to remove the front cover or faceplate of the AC unit. Refer to the manufacturer’s instructions specific to your model for safe access to the evaporator coil.
6.2. Vacuuming Loose Debris
Similar to the condenser coils, use a vacuum cleaner with a brush attachment to remove any loose debris from the evaporator coil. Be gentle to avoid damaging the fragile fins.
6.3. Brushing the Coil
Using a soft brush, lightly brush the evaporator coil to remove any remaining dirt or dust. Be thorough in your brushing, paying attention to the corners and edges where debris can accumulate.
6.4. Applying Cleaning Solution
Prepare a cleaning solution by diluting mild detergent in water. Apply the cleaning solution to the evaporator coil using a spray bottle or a cloth. Ensure even coverage and leave the solution on for a few minutes to penetrate and loosen dirt.
6.5. Rinsing and Drying the Coil
Thoroughly rinse the evaporator coil with clean water to remove all traces of the cleaning solution. Take care not to oversaturate the coil. Allow the coil to air dry completely before reassembling the AC unit.
7. Clean the Drain Pan and Drainage System
7.1. Locating the Drain Pan
The drain pan is typically located beneath the evaporator coil within the AC unit. Locate the drain pan, which collects condensed water that drips from the coil during operation.
7.2. Removing and Cleaning the Drain Pan
Carefully remove the drain pan from the AC unit. Empty any standing water and clean the pan using a mixture of mild detergent and water. Ensure that the drain pan is free from debris or mold buildup.
7.3. Clearing the Drainage System
Inspect the drainage system to ensure that there are no blockages or clogs. Use a pipe cleaner or a small brush to remove any debris from the drainpipe or tubes. Clearing the drainage system will prevent water leakage or overflow.
8. Check and Clean the Blower Fan
8.1. Accessing the Blower Fan
To access the blower fan, you may need to remove the front cover or faceplate of the AC unit. Consult the manufacturer’s instructions specific to your model for safe access to the blower fan.
8.2. Cleaning the Fan Blades
Inspect the fan blades for any dirt or dust accumulation. Use a soft brush or a microfiber cloth to gently clean the blades. Ensure that the fan spins freely and smoothly after cleaning.
9. Clean the Window and Frame
9.1. Window and Frame Inspection
While you have the AC unit removed for cleaning, take the opportunity to inspect the window and frame as well. Clean any dust, debris, or dirt that may have accumulated on the window and window frame.
9.2. Washing the Window
Clean the window with a suitable glass cleaner or a mixture of mild detergent and water. Use a microfiber cloth or a squeegee to ensure streak-free results. Allow the window to dry completely before reinstalling the AC unit.
9.3. Cleaning the Frame
Wipe down the window frame and sill with a damp microfiber cloth. Remove any dirt, cobwebs, or grime that may have accumulated. Consider using a mild detergent for more stubborn stains. Dry the frame thoroughly.
10. Reassemble and Test the AC Unit
10.1. Reinstall the Filter
Once all the components have been cleaned and are completely dry, reinstall the filter into its designated slot. Ensure that it fits securely to prevent air leakage or bypassing of unfiltered air.
10.2. Plug In the AC Unit
After reassembling the AC unit and securing all parts back into place, plug it back into the power source. Double-check all connections to ensure safety and proper functioning.
10.3. Test for Efficiency
Turn on the AC unit and let it run for a few minutes. Check if the airflow is smooth and consistent. Monitor the temperature and performance to ensure that the unit is operating efficiently after the cleaning process.
By following these simple steps, maintenance and regular cleaning of your window AC unit will not only ensure its longevity but also provide you with cleaner and healthier air. Remember to refer to your specific AC unit’s manual for any model-specific instructions or precautions. Stay cool and enjoy the comfort of a well-maintained AC unit!